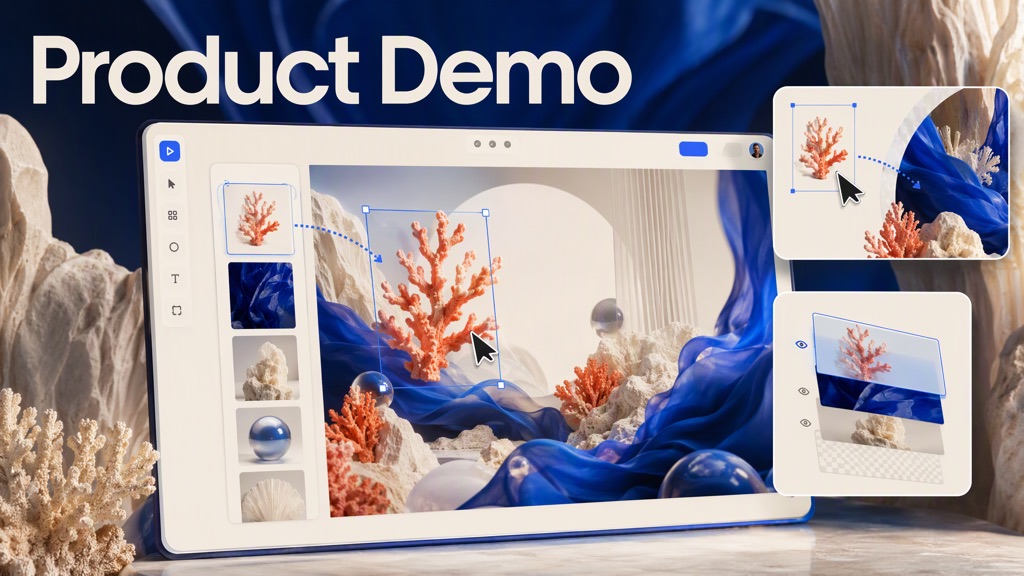
Provide: Product website/landing page or actual screenshots/recordings, logo, and brand colors. Interface-flow films also need 3–5 operations to demonstrate.
Receive: A product demonstration video and editable source project.
Suitable for software, AI tools, apps, and SaaS whose behavior can be shown on screen. Use Product Video Studio for physical products; use the reference-video remake inspiration to adapt an existing launch film.
Tools and responsibilities
- Teardown — retrieve and read the full “Break Down a Reference Video into an Interactive Report” inspiration through Flova MCP by name: For launch films, inspect website claims, selling points, numbers, customers, CTA, palette, fonts, screenshots, and logo.
- storyboard planning: Plan launch-film beats using marketing structure; use its reference-finding method when a beat lacks direction.
- HyperFrames, required: UI demonstrations, animated text/numbers, logo ending, rendering.
- Flova, as needed: Generate live-action-like usage scenes, object backgrounds, music, and narration; never generate the interface itself.
- FFmpeg: Assembly, mixing, export. Browser: Open real product pages and capture screens or operations; let the user log in when necessary, then continue capture.
References
- Read for both formats: acquisition, asset checks, showing use, and facts that cannot be invented.
- Read for interface-flow films: states, beats, motion, loops, and checks.
- Read when a launch storyboard selects a reference motion clip.
Boundaries
- Product facts come from the website/user: preserve actual features, numbers, customers, and testimonials; omit unsupported claims.
- UI must come from user screenshots/recordings or actual product imagery. Do not generate UI or demonstrate nonexistent features.
- Render exact product names, logos, slogans, numbers, and URLs in code layers.
- Confirm rights to imagery, customer logos, and music; remind the user to verify customer-logo/testimonial use.
- Generated people do not impersonate real users. Generated usage scenes must not carry real customer names, testimonials, or data, or imply those customers were filmed. Remind users to follow platform AI-labeling requirements when applicable.
Workflow
1. Obtain facts and actual UI — confirmation point
- For a URL, use Teardown to organize opening, turn, proof, ending, design reference, and asset inventory into
capture/. For login-protected pages, open an available host browser, let the user log in, then continue inspection/capture. Reuse existing user-authorized sessions. - Acquire/check actual UI following the reference. Each proof operation needs before, during, and result states. Request missing states rather than generating substitutes.
- Confirm format/specifications. Launch defaults: 30 seconds, 16:9; lay out 9:16 separately rather than cropping. Confirm narration, language, audience, one main takeaway, and CTA. Interface-flow defaults to 1:1. Record in
docs/brief.md.
Launch film
2. Narration and beats — confirmation point: Select content by marketing function. Open with the hero claim or a pain-point image. Choose 2–4 demonstrable selling points, each proving one thing with a distinct method. Put before/after contrasts in a turn. End with the website's CTA. Timing references: 15 s = opening 3 + proof 9 + ending 3; 30 s = opening 3–5 + turn 2–3 + proof 18 + ending 4; 60 s = 3–4 proof groups with a turn between each pair. When narrated, write narration before beat durations; show exact numbers visually. For every beat, record its role and what it accomplishes; remove beats with no purpose.
3. storyboard — confirmation point: For each beat, specify role, duration, narration, visual treatment (live demo, output showcase, counter, customer-logo wall, animated text), asset source (user UI, website, Flova, code), production method, and optional reference clip. Follow the website design reference.
4. Scenes and sound — confirmation point: Use Flova for realistic people using the product (turn screens away or leave a compositing area for real UI), related objects/brand-color backgrounds (plain background when cutouts are needed), music supporting fast cuts, and narration. Request no text, logos, or subtitles in generated imagery. Show visuals and audition audio with the user.
5. Motion, assembly, acceptance: Build UI, text, and numbers beat by beat in HyperFrames. Counters land on source-accurate numbers. End with logo, one promise, URL, holding stable for at least 2 seconds. Adapt selected clips using the reference. Assemble in FFmpeg, align cuts with music, and duck music beneath narration. If HyperFrames rendering is unavailable, explain the limitation; the fallback is FFmpeg pan/zoom on screenshots and browser/Python-rendered transparent text PNGs composited with overlay (do not depend on drawtext, often absent). Check every number/customer/feature against the source, authentic UI, matching brand colors/fonts/logo, sufficient reading time, and exact URL/button.
Interface-flow film
2. State list — confirmation point: Before coding, present the complete state list from . Expand the user's 3–5 operations into 8–12 states. Default reference: 120 BPM, 8 bars, approximately 16 seconds; meaningful action every beat and a return to the first state.
3. Build and inspect each beat: Follow morph-flow. Make every frame a deterministic function of time, not live timers, respecting HyperFrames rendering requirements. Render one frame per beat to check state, occlusion, reading time, and cursor targets before rendering the whole film.
4. Render: Export MP4 and watch completely, especially the loop seam. No music by default; optionally generate light music in Flova.
Delivery and organization
Deliver MP4 and requested aspect-ratio variants, docs/brief.md, launch narration/beat sheet/storyboard or flow state list, and source project. Changing a selling point, slogan, copy, or screenshot rerenders only the affected part.
demo-<product>/
├── capture/   Website screens, text, styles
├── docs/      Brief, breakdown, beat/state list, storyboard
├── assets/    ui/ screens and recordings; flova/ scenes, objects, music, narration
├── layers/    HyperFrames source and rendered clips
└── output/    Final video and assembly scripts
Morphing Container and Cursor Flow
One container morphs throughout the film while the cursor leads operations. Implement one HTML file rendered frame by frame. For screenshots that appear in use (cursor, typing, zoom, state changes), see .
Core image
- One persistent container continuously changes size, corners, color, and content. Each change should feel like the same object transforming, not a page carousel.
- Cursor clicks/drags motivate every transition; visible outcomes have visible causes.
- Camera zoom makes the current state fill the frame, pulling back when needed.
- End at the initial frame, including cursor position and velocity, for a seamless loop.
State list
One row per state:
Preserve the user's operation order; do not add/remove steps for appearance. Every state changes at least one dimension, content item, position, or number. Use supplied text, numbers, and product names only.
Motion rules
- Use spring easing with at most slight overshoot, not exaggerated bouncing.
- When a value has different targets at different beats, compose springs so the image depends solely on time.
- Give leading/trailing edges of sliders or switch knobs different springs: the leading edge extends then retracts for a liquid feel.
- While dragging, values follow the cursor; after release, spring back from the release position.
- Give replacing text separate entrance/exit times and slight intermediate blur rather than a hard cut.
- Avoid styles that force an independently composited layer on elements the camera magnifies, which can blur when enlarged.
- Allow 3–6 seconds for a complete move/click/result operation; hold text long enough to read.
Exclusions and visual tone
Do not use bouncy easing, particles, glow, decorative UI gradients, inconsistent icon strokes, dead intervals, or an obvious template look. Do not invent features/buttons/pages, numbers/customer names/testimonials, another product's interface, or plausible real-user data. Without real UI evidence, use an animated explanation or remove the beat.
Use a clean solid background (warm gray, light gray, or pale brand color), predominantly black/white UI, one brand accent on a button, switch, or curve, one sans-serif family, and rounded/shadowed UI cards showing only the relevant area.
Beat-by-beat checks
Render a frame per beat before the full film:
- State matches the list; every interface comes from actual supplied material.
- Reading time is adequate; enlarged text remains clear.
- Clicks land on buttons without drift.
- No excluded effects/content appear.
- Last frame matches first frame.
Real UI Demonstrations
The main proof is that the product actually works: viewers see a task completed in its real interface. This reference covers acquisition, animating screenshots as use, and facts that cannot be invented.
Acquire the real UI
Reuse existing material first. For new material, attempt browser capture before requesting manual screenshots:
- Supplied material: Reuse user recordings/screenshots; do not require recapture. Each demonstrated operation needs before, during, and result states.
- Browser capture: Open the product in the host's available browser, including a side browser or connected Chrome. Reuse an authorized logged-in session. If login is needed, open it, let the user log in, confirm target-page access, then continue capture/recording. Login requirements do not make a page inaccessible and do not justify immediately asking for screenshots.
- Website product imagery/video: Reuse actual screenshots, interface images, and demos collected from the website. Beautified site screenshots can be used, but do not alter their content.
- User supplementation: Request specifically missing screens only when no browser is available, access still fails after login, or the user chooses manual assets. Suggest 1920×1080 or higher recording, notifications/unrelated windows closed, and demonstration data.
Check the material below. Never generate UI with an image model or code a nonexistent product interface.
Inspect assets
- Remove real names, emails, phone numbers, orders, and other private data: ask for demo data or redact during production.
- Exclude bookmark bars, unrelated tabs, notifications, and debug output.
- Resolution must support the planned close-up without losing clarity.
- UI language matches the video's language.
Make screenshots look in use
Choose one or two actions per proof; do not stack every device:
- Cursor: Enter from outside along a natural curve, pause over the button, click with visible pressed feedback.
- Typing: Reveal text character by character with a blinking caret. Pause half a beat after typing, then send.
- Focused zoom: Move from the page into a key result/number; surrounding areas may dim slightly.
- State transition: Switch crisply or use a mask reveal from before to result so the consequence of a click is clear.
- Sequential results: Reveal list/card/chart items in order instead of all at once.
- Counter: Roll and stop at the accurate number.
An input → click → result operation takes 3–6 seconds. Hold readable text until viewers can finish it.
Integrate the UI visually
A launch film rarely presents the entire screen flat throughout:
- Float a rounded/shadowed UI card above the website's background/brand color.
- Crop to the relevant input/result area, excluding irrelevant UI.
- Collage related real-object cutouts (clothes, parcels, documents) with subtle shadows to connect software to life.
- Follow a usage scene with a UI close-up, or overlay actual interface text, such as the user's input, on that scene.
Do not invent
Never add nonexistent features/buttons/pages, unsupported numbers/customers/testimonials, another product's UI, or plausible real-user data. When no real interface supports a demonstration, use another proof form (animated explanation or a real usage scene) or remove the beat.
Build Layers from a Reference Clip
The storyboard has already selected a reference clip for a beat and recorded its id; use the this document's storyboard guidance reference-finding method to find one. This explains obtaining its project, adapting it, and rendering in HyperFrames. The reference determines how; the storyboard determines what. Do not add an attractive effect absent from both source and storyboard.
1. Download the bundle
Find the clip in https://static.heygen.ai/hyperframes-oss/desktop/moments/v3/manifest.json and read its bundle fields: key, sha256, bytes.
- Download
https://static.heygen.ai/hyperframes-oss/desktop/moments/bundles/<key>; bundles are not underv3/. - Verify size and SHA-256 against the manifest before use.
- Extract into
layers/<clip-id>/source/, preserving the original. Reject absolute archive paths and entries containing... - A clip without
bundleis preview-only; no project is available.
Download, checksum, or extraction failure is failure: explain it, rather than substituting another clip as the selected one.
2. Understand it
Actual contents govern; common files include:
dense.md: Recreation specification for frames, colors, fonts, objects, timestamped actions, exclusions.[M]indicates measured values;[H]and similar labels indicate inference.code/REMIX.md: Editable text slots/capacity, color/font variables, parameters, timeline markers.code/index.html, supported bycode/assets/andcode/vendor/.
Record the signature actions/times that make the clip work, editable slots from REMIX, and invariants.
3. Adapt to the user
- Copy all of
code/tolayers/<clip-id>/and edit the copy. Keepassets/andvendor/besideindex.html. - Change only what
REMIX.mdpermits: text slots,:rootcolor/font variables, parameters. Do not rewrite the timeline. - If text exceeds capacity, shorten it first. If expansion is necessary, inspect wrapping, occlusion, alignment, then adjust layout.
- Prepare Flova/user assets to slot dimensions/proportions and check cropping.
- Adjust aspect ratio/duration according to REMIX; if undocumented, modify cautiously and record it.
4. Preview, compare, render
- Read the environment's current HyperFrames Skill/docs and follow its preview/render requirements.
- Compare key times against the reference and dense.md: retain rhythm, motion, holds; ensure user text/data accuracy.
- Render the clip for FFmpeg assembly; use an alpha-capable output when compositing over another scene.
Without a suitable clip
Reference clips are optional. If none fits or the bundle is unavailable, implement from the storyboard and HyperFrames Skill. It is also valid to independently implement from preview/dense.md descriptions.
Record
Keep clip ID, source link, SHA-256, borrowed/replaced parts, render outcome, and remaining differences after comparison in the project.
Storyboard and asset handoff
When new shot planning is needed, the host uses this workflow directly; reuse a clear existing shot list or edit brief. Record each S01 segment’s script link, visual/information goal, duration/time, subject/action, camera or element motion, exact text/sound, transition and production method. Link E01 target elements to user material and actual resources; keep REF-E01 source identities separate and mark unavailable assets as pending. Check identity, space, action and sound continuity; retime to actual speech. For marketing, label applicable hook/turn/proof/cta roles and the viewer gain, using grounded demonstrations; teaching and narrative work retain their own structure. For an unclear expression, find a real reference and record what to borrow/replace. No separately named planning skill or file is needed.